Part 10: Singapore: January 22, 1942

The element of surprise has been lost, but if can get our offensive going, it should still be possible to capture Singapore before they really dig in.

Once Kuantan is secured on the east side, we don't need to advance any farther south. We'll be able to spare some troops to go over and assist with the continued push southward. We don't really have any other route; we're just going to have to fight through.
Axis Turn 16: January 22, 1942
Day, Fair (Dry)

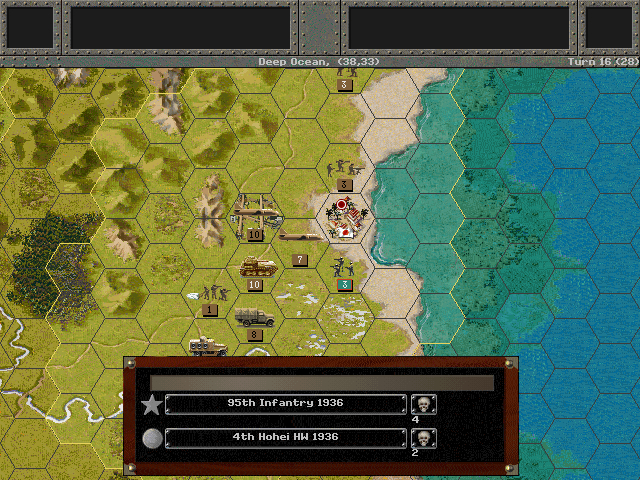
Kuantan is captured, but the troops have worn themselves out chasing down the retreating AA guns.

Our bombers are the most effective at taking out the ground forces. We are forced to rest the ground troops.

We need to wait a few days to build up combat strength, and some forces pull back.
Allied Turn 16: January 22, 1942
Day, Fair (Dry)
A difficult fight ends up straining our forces at Kuantan, and we are forced to pull out of the city. It's unlikely that the British can retake it, however.

The counterattack in the west comes on hard. The 1st Hohei, our only upgraded infantry unit, is lost.
Axis Turn 17: January 25, 1942
Day, Fair (Dry)
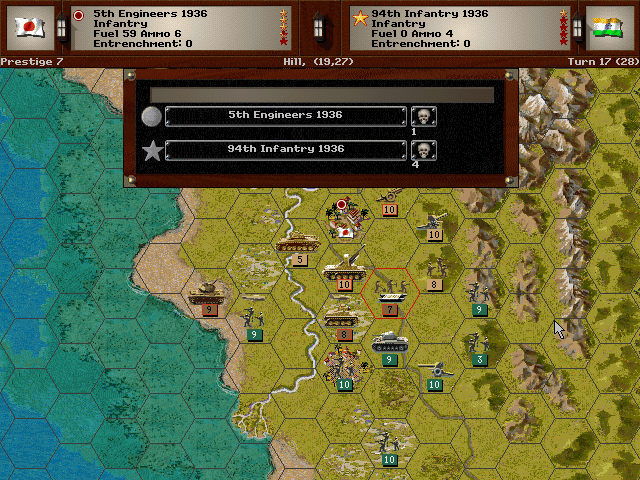
Our own forces halt the Allied counterattack just a few days after it starts. We still aren't moving forward, however.

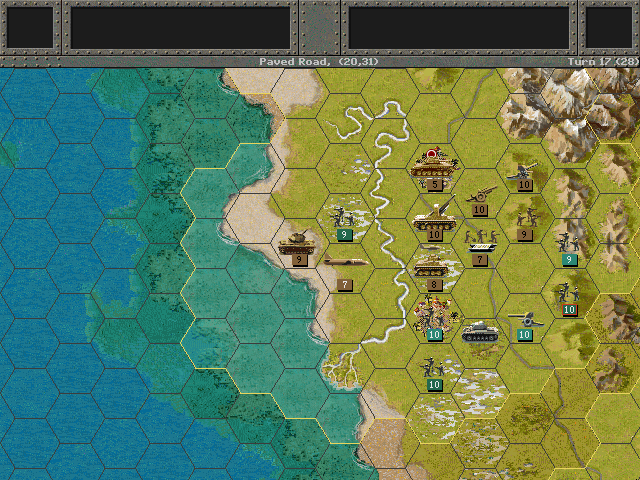
With the British holding the line at Ipoh, the Japonies decide to make a bold move at Kuala Lumpur: They assault the city, and the shock of the attack catches the defenders totally off guard. The cavalry grabs control, if only temporarily.
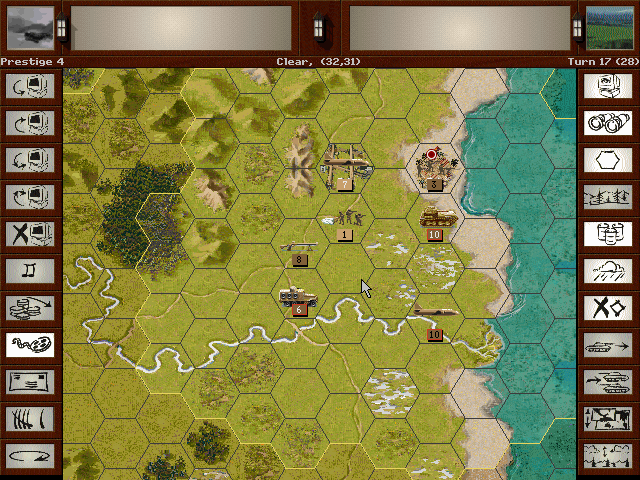
Mopping up at Kuantan secures our position north of the Pahang River; we can now move some of these forces in the direction of Kuala Lumpur.
Allied Turn 17: January 25, 1942
Day, Fair (Dry)
The British do not seem to respond to what happened at Kuala Lumpur. Instead they simply strengthen the line at Ipoh.
Axis Turn 18: January 28, 1942
Day, Fair (Dry)

Thanks to the airfield at Kuantan, we are able to send bombing raids over Kuala Lumpur. If there is no response, we can next capture the airbase there.

Heavy combat weakens the enemy line some more, but we have no breakthrough yet.

The air units come back from the north and with no enemy fighters to deal with, they get in some good ground strikes.
Allied Turn 18: January 28, 1942
Day, Fair (Dry)

The British finally start to pull back.
Axis Turn 19: January 31, 1942
Day, Fair (Dry)
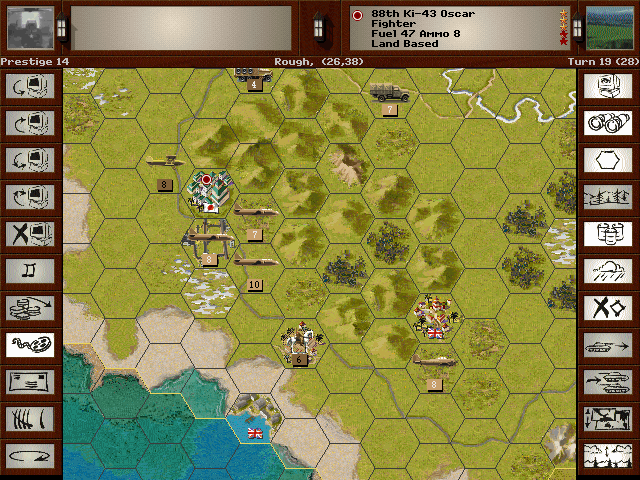
The whole area south of Kuala Lumpur appears to be undefended.

Our main force starts to push southward down the road again.
Allied Turn 19: January 31, 1942
Day, Fair (Dry)

Realizing they may be cut off now, the British are in full retreat.
Axis Turn 20: February 3, 1942
Day, Fair (Dry)

The offense is on the move again, although we do have to be careful about casualties.

We push aside most enemy resistance; control of the skies will allow us to finish off whatever's left behind.

The first few enemy troops are spotted to the southeast.
Allied Turn 20: February 3, 1942
Day, Fair (Dry)
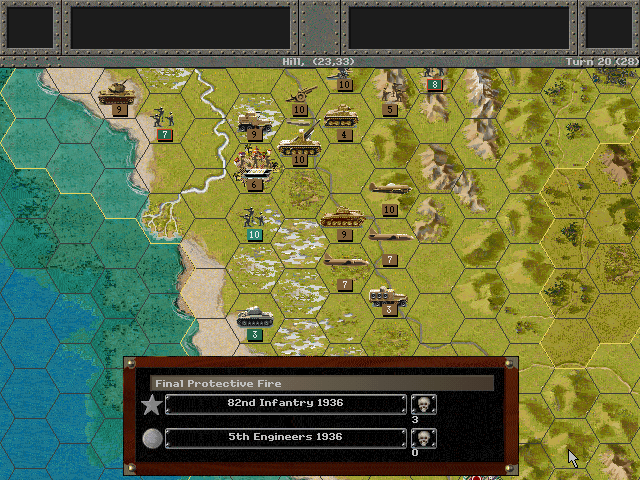
The enemy attempts to hit us back, but we stand strong and they take heavy losses while we take none.
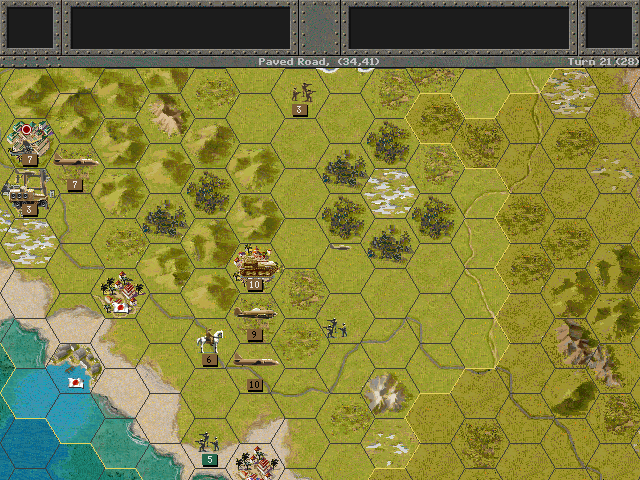
Axis Turn 21: February 6, 1942
Day, Fair (Dry)

To the south, we need the main force to catch up; the Japonies can't sustain an offensive all on their own.

Some units are driven off into the highlands, some flee toward the coastline. It should not be hard to get most of the core underway, but we will have to do some clearing out of the remaining pockets.
Allied Turn 21: February 6, 1942
Day, Fair (Dry)
The only forces the enemy has in the way organize as best they can to hold us off from reaching Singapore.
Finally the line has broken. There is no way the British can hold this region anymore, but the question is whether we can still reach Singapore and capture it on the original schedule.

Unit Spotlight
Type RA 37mm AT Gun (search on page or scroll down to see it)
PG Name: RA 97 Type: Anti-Tank
Effective Date: 7/36
Value:2 Cost:24 Spot:2 Move:1 MM:Gun Trans:Naval Fuel: -
Init:6 SA:2 HA:7 AA:0 NA:0 GD:8 AD:6 CD:0 TT:Soft Ammo:10
The 'RA' designation here indicates a gun of German make. Most of these (or perhaps all of them) were PaK 36 guns captured from the Chinese. There may have been a small quantity purchased directly from Germany or built under license. The Japanese were behind in development of armor-piercing weapons, and in the 1930s when they entered China, they were happy to re-use a proven model. There was a domestic 37mm gun, the Type 94, which this in-game unit could also stand in for. It was based off of the PaK 36, and was fielded in far greater numbers than these were during the war.
In-game analysis: This gun is down there with all the really cheap AT guns that can be bought as roadblocks. It is indeed identical in stats to the German 3.7 PaK35/36. This might slow the enemy down if it can get entrenched, but it's hardly likely to do much damage. If this were the PGF AI, I'd be a bit worried about these sorts of units flooding the objectives in longer battles.
Mitsubishi Ki-21 (Sally)
PG Name: Ki-21 Sally Type:Level Bomber
Effective Date: 7/36
Value:25 Cost:300 Spot:2 Move:8 MM:Air Trans:Naval Fuel: 127
Init:4 SA:1 HA:4 Size: 20 AA:[9] NA:3 GD:9 AD:8 Ammo:6
While this was a fairly modern heavy bomber in 1936 when it was prototyped, and it did see use well into the war, it didn't age very well. Like many Japanese planes, it provided little protection for the crew, and its armament was fairly weak. As a heavier bomber, it couldn't really make up for those shortcomings with maneuverability the way the fighters could. Near the end of the war it was also effective as a kamikaze plane, since it was capable of carrying a larger payload than most airframes put to that purpose.
In-game analysis: As a baseline bomber, this is decent, but nothing special. The Mavis is slightly preferable since it has better defense and an amazing spotting range.